Flour, salt, water
Sourdough is a very natural and traditional method of baking bread. It is healthier and creates a uniquely tasty loaf. The ingredients are the simplest: flour, water, salt.
During Covid, with yeast being in short supply because of panic buying, sourdough became a really good option for making bread. In fact, in most cases, it is a better option. I have been converting some of the recipes that I normally made with yeast into sourdough recipes – and most have worked really well.
Making Sourdough
You may wish to read more on other websites such as

Equipment and Utensils
Essential Starter List
The most basic equipment that you need to make sourdough bread is
- Mixing bowl
- Measuring jug
- Measuring spoons (specifically a teaspoon)
- Scales or measuring cup (though all recipes here use scales)
- Fork for whisking
- Spatula (or use your hands)
- 20cm bowl for proofing
- Proofing cloth or a cotton tea towel.
- Cling film
- Sharp knife or blade
- Baking tray.
Sourdough maintenance
- Kilner Jar (preferably 2 so you can start with a clean jar every so often)
- Baker’s Whisk (instead of the fork)
Additional equipment
- Banneton (proofing basket)
- Cloche or Dutch oven. Some cast iron casserole pots can be used upside down like a cloche ie if the lid has side handles instead of at the top.
- Baker’s lame/grignette for slashing the bread surface
Basic Ingredients
- Strong White Flour
- Rye Flour
- Strong Whole Meal Flour or Malted Grain Flour eg Granary – only Rank Hovis Ltd can produce flour with the Granary name. there are close equivalents. I use Matthews Cotswold Crunch
- Fine Sea Salt
Feeding Sourdough

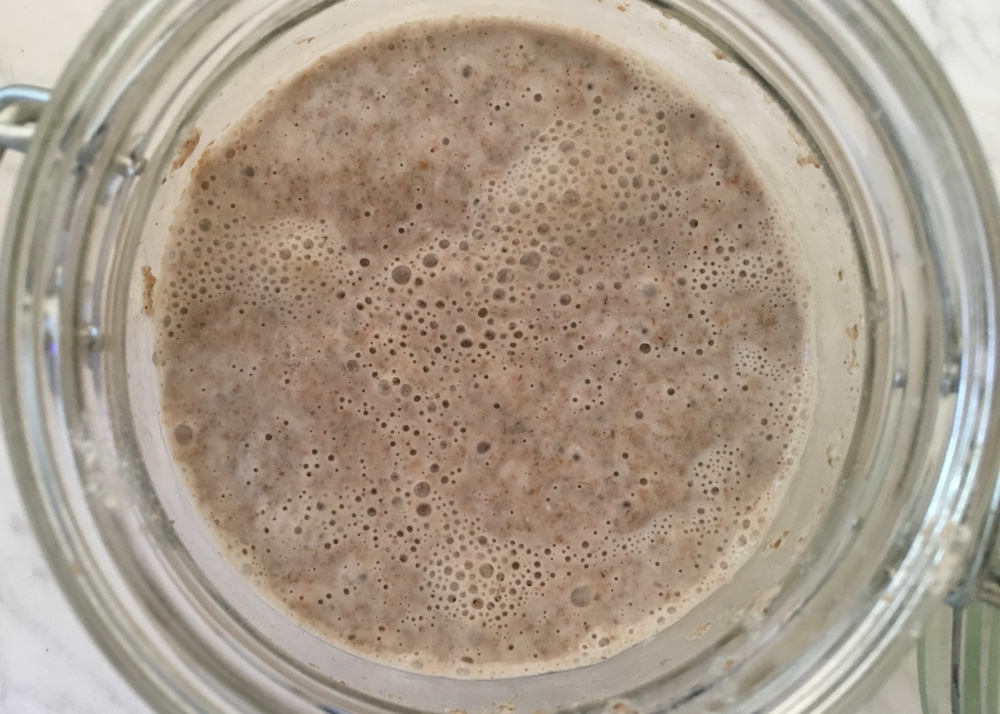
Sourdough Starter is a culture of naturally made yeasts and bacteria that needs to be maintained. How you maintain it depends on how often you will use it.
Jars
To store and look after your sourdough you will need a jar with a loose fitting top. A Kilner Jar is perfect for this. I use the 1 litre round jars: The bakers whisk fits in nicely to mix your starter and there are no corners to collect unblended starter. As you do not want a tight seal, detach the lid from the jar by squeezing the hinge from both sides towards the centre to separate the 2 parts of the wire construction. The wire banding holding the lid will come away so store it away in case you need it again. You can always reattach it again in future. Also you do not need the rubber seal, just the jar and the glass lid. Other brands of jars include Bormioli, Kitchencraft and Argon.
Which flour?
Wholemeal Rye Flour makes a robust sourdough starter, however depending on what kind of breads you prefer to bake, you may wish to keep a lighter sourdough starter and feed your starter with strong white flour (ie bread flour). If you are given some sourdough starter and do not have the right flour to begin with, then use any flour to feed until you can get the right flour.
Rye Flour starter is best for wholemeal loaves of all kinds. White Flour starter would be used for white brerad loaves, pizzas, focaccia. I keep both types of sourdough starter though i use the white sourdough starter far less.
You can convert a sourdough starter from one type of flour to the other over a period of several feeds. Start with a new jar and 60g of starter and continue feeding from there.
Feeding
Starting with a new jar, add 30g of sourdough starter with 15ml of lukewarm water and 15g flour. Mix well with a baker’s whisk, or alternatively just use a fork.
The next time you feed, add 30ml of lukewarm water and 30g flour.
The starter rises up the jar during the hours that you leave it, and then also it will fall back again a little.
The volume is obviously increasing so next time add 50g lukewarm water and 50g flour. I never increase beyond this 50ml of water and 50g of flour but by now you should be using it too.
Discarding sourdough
After a few feeds like this, if you have not used any starter, then you will need to remove some of the starter. This Sourdough Discard can always be used and so don’t throw it away. I keep sourdough discard in a round plastic container with a tightfitting clipped lid.Use a serving spoon to remove starter from the jar into your sourdough discard storage container. Just leave about the same amount in the jar that you started with and the feeding cycle starts again. Or this could be the opportunity to start with a clean jar (see below) and restart with 30g of starter.
I store the discard from the rye starter and white starter in the same container all mixed together. It will all be used in Leftover Sourdough Recipes. Nothing wasted!
Restart with a fresh jar
Every so often, say every 2 or 3 weeks, start again with a clean jar. You will know when it is time to change as you will start to have hardened sourdough starter around the rim of the jar. It is useful to have a second kilner jar to make starting again easier. Otherwise empty your starter into a bowl while you clean out your jar. You will find that sourdough starter sets pretty hard and it does take some effort to clean.
How often do you feed the starter?
If you are not baking at the moment, keep the starter in the fridge and feed it at least every week. It will need feeding a couple of times in one day before you can use it.
If the starter is not in the fridge then feed it every day.
Start Baking
A typical sourdough baking timeline might be
Day 1
If, like me, you are baking every day or 2 then you skip this stage and go straight to Day 2
When you are ready to bake, you need to give your starter at least two feeds at 8 to 12 hours intervals. So on this day feed your sourdough starter in the morning and evening
Day 2
This is the day that you are doing most steps
- Morning: Dough making starts with Making the leaven. This is is the mixing of the required amount of starter with a small amount of flour and water similar to the usual feeding.
- Afternoon: Mix in the remainder of water and flour (the autolyse). 1 hour later add the salt, followed by 3 one hourly intervals (approximately) of stretching and folding. Each of these steps only takes a minute.
- Evening: shape the dough, ready for proofing in a banneton or suitable bowl and store in the fridge overnight.
Day 3
Bake the bread in the morning and it will be ready to eat for lunch
Working Day Schedule
If you are fitting your baking around your work time, here is a suggested schedule that could work for you. Sourdough seems to have many steps but each only takes a minute. It is the dough that is taking the time. It is not actually much work. I’ve put a suggested length of time next to each step to illustrate how quick this can be. It is easy to forget to do the next step, especially after a long day, so if you have an Alexa, Google, Apple device, you could ask Alexa, “Hey Google” or Siri to give you an alarm or timer for the next thing to be done.
Day 1
Assuming your sourdough starter has been sitting in the fridge for a few days without being fed then you need to re-activate your sourdough starter. If your sourdough starter has been well maintained with daily feeds you can go straight to Day 2
Before Work
Feed the sourdough starter and leave on the work surface (1 minute)
After Work
- Feed the sourdough starter. Leave on the work surface (1 minute)
- After a couple of hours, put the sourdough starter back in the fridge – certainly before you go to bed. (10 seconds)
Day 2
Before Work
- Before going to work, take your sourdough starter out of the fridge and weigh out your sourdough starter in the bowl and feed as per the recipe. Cold sourdough starter takes longer to react so this will help delay the process (2 minutes)
After Work
- Once home from work, add the rest of the flour and water mix the dough together, that is the autolyse (4 minutes)
- After one hour add the salt and squeeze into the dough (1 minute)
- An hour later do the first stretching and folding. (30 seconds)
- Do 3 more stretches and folds during the next 2 hours or so. (30 seconds each time)
- Cover the bowl with cling film and leave on the work surface overnight. (1 minute)
Day 3
Before Work
- Remove the dough from the bowl and shape the dough and place into your banneton (or suitably shaped bowl). (3 minutes)
- Cover with cling film and put in fridge.
After work
- Heat the oven (20 minutes – depending on your oven and if you are using a cloche)
- Turn your dough on to cloche base or baking tray.
- Slash and decorate as required and bake. (45 minutes)
Making the leaven
Preparing the dough
Slashing the dough
Slashing the surface of the dough helps the bread to rise more. If you forget, the bread will still rise though. Often it will create it’s own cracks in the surface – even when you have slashed it already.
You can slash with a sharp blade, though a baker’s lame or grignette makes it much easier. There are many ways to make the slashes and you may want to develop your own patterns to associate with different type of bread. Starting off with 3 or 4 simple cuts is a good start.
Decorating
Decorating the surface can be done with rolled oats, rye flakes, seeds or simply sprinkling with a contrasting flour, eg white flour on a wholemeal loaf.
Finally Before Baking
Have I killed off my starter?
Probably not. Your sourdough starter may have been neglected, especially if it has been in the fridge, even for a few weeks, then the chances are that all is not lost. In most cases your starter can be revived with a few days of care.
Liquid on surface

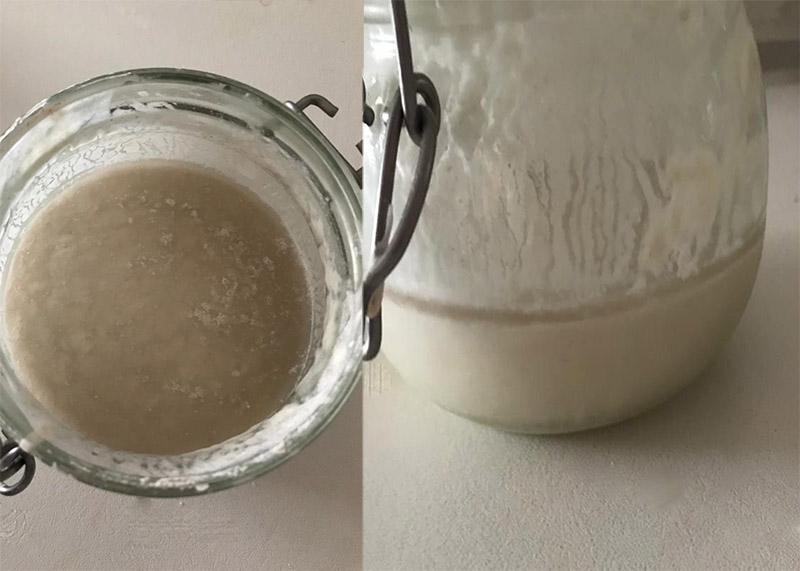
This is quite normal. especially with white flour starter. This liquid is the alcohol, called “hooch”, created as the sourdough ferments. It is a sign that the sourdough needs feeding. Pour off the hooch and carry on feeding a few more times
Dry surface, dark edges
Take out the dryer darker surface with a spoon. If you don’t have a spare jar then empty out the starter into a bowl while you clean your jar. Transfer 30g of starter into the new jar and feed with 15g of flour and 15g water. Then carry on your feeding regime
Orange/pink discolouration
If your starter has been neglected for some weeks out of the fridge and you can see orange or pink areas on the surface or if there is a visible mould, then, yes, you’ve killed it! In this case you need a new donation of sourdough starter or to create a new one yourself
